I first really fell in love with soft, creamy, salty burrata cheese this August in California when I was served it over fresh heirloom tomatoes with a simple drizzle of olive oil and sprinkling of salt and pepper (similar to this). Since then I’ve encountered it on many a restaurant menu and (almost) every time have ordered it and enjoyed it immensely.
Summer vegetable salad with burrata cheese croquette, part of lunch at Mondavi
I looked into how to make burrata cheese, as cheesemaking has been in the queue of “cooking techniques to learn” for quite a while, but I think I may start with a simpler cheese for my first cheesemaking endeavor (perhaps ricotta, especially since we got a Thermapen for Christmas so temperature monitoring will be vastly simpler).
So deep fried or fresh, if you encounter burrata in the grocery store or on a restaurant menu, I highly encourage you to try it!
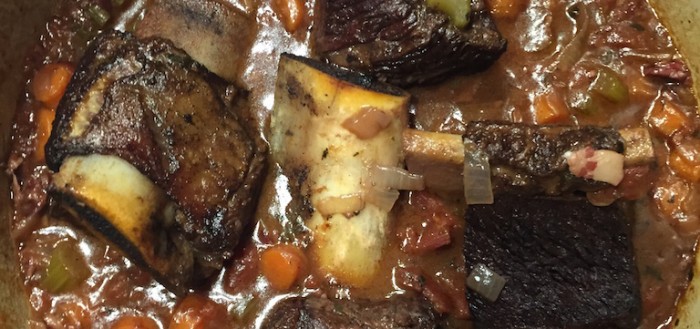
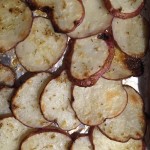
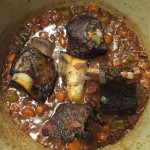
This recipe for Beef in Barolo from Food 52 turned out really well. We went to Belmont Butchery for the short ribs, a very cool little shop in Richmond. Served it with a quick sautéed broccolini with lemon and garlic (blanched first so they’d sauté up faster then topped with panko breadcrumbs mixed with some lemon zest for some additional texture and flavor) and oven roasted potatoes (love the mandolin for thin crispy slices) and had a bottle of Elizabeth Spencer2009 Spring Mountain Napa Cabernet along with it.
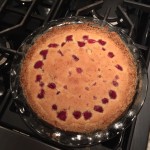
For dessert I knew I wanted something pie-like but didn’t feel like making a proper pie crust so I found this raspberry tart recipe which was amazing (I omitted the walnuts as we didn’t have any). This turned out to have a very custard-y filling, dotted with fresh raspberries and a shortbread-style crust. Delicious.
I had bought a bag of mini M&M’s from Amazon a while back in the hopes of recreating a childhood cookie-favorite, oatmeal M&M cookies. However, upon being faced with an impending deadline for a holiday cookie exchange, I opted to made more “traditional” chocolate chip cookies using the M&M’s instead. Always on the search for the perfect soft and chewy cookie (with just a little crisp on the outside edges) I found Martha Stewart’s Soft and Chewy Chocolate Chip Cookie recipe and it was a winner. All of the things I wanted it had (just ignore the quantity of butter used, it’s what makes them so tasty).
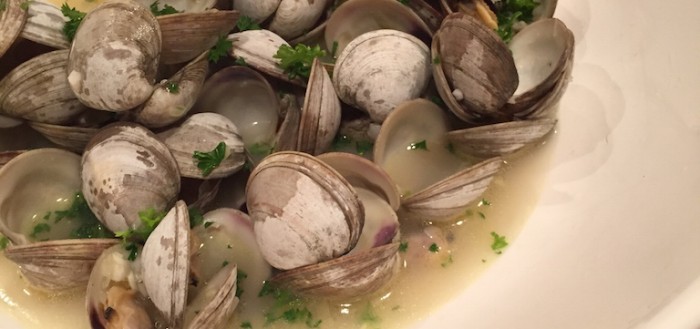
The idea to make this recipe started when we were asked to bring over an appetizer/starter for an Italian-themed dinner one weekend. We knew mussels were coming into season, I had been wanting to try cooking shellfish, and Jeremy and I both love the mussels in white wine dish that’s available at quite a few of our favorite restaurants, so all those factors led us to opting to prepare that to bring over to the Golds for dinner. We visited our local fish monger early that morning but the mussels had not come in yet, all he had were clams. Figuring they couldn’t be that different we opted for those and headed back to the house. A quick Google search yielded this steamed clams in white wine recipe and it is perfect. I did feel a bit bad when we dropped the clams into the hot broth, but despite that we were well rewarded with a tasty dish. Just the right amount of citrus, butter and wine, topped with parsley and served with fresh foccacia, it’s wonderful how something so simple can taste so amazing when you have good ingredients. We did add a tablespoon or so of clam juice just to up the salty/brine-y/clam-y flavor but that was the only tweak to the recipe.
Jeremy and I later made this same dish but turned it into an entree and served it over linguini, also recommended.
We always try to start off with a fun cocktail of some kind for special occasion dinners. I had been chatting with Jeremy’s mom trying to think of a good cocktail, and also trying to find a good “standard” cocktail that I’m willing to order at any bar as a fallback drink, and Eileen suggested Southern Comfort Sours. I remember back in grad school enjoying “SoCo & Coke” so figured it was worth a shot…yum, to me, with the homemade sour mix (simple syrup, lemon and lime juice) the drink tastes like a SweetTart.
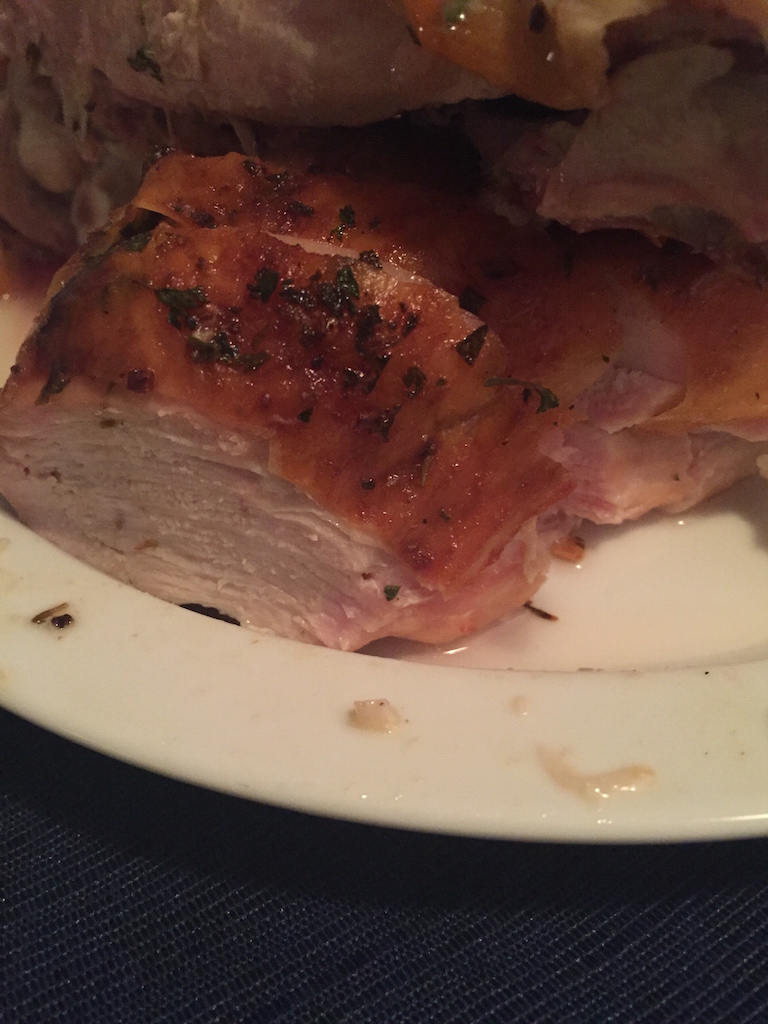
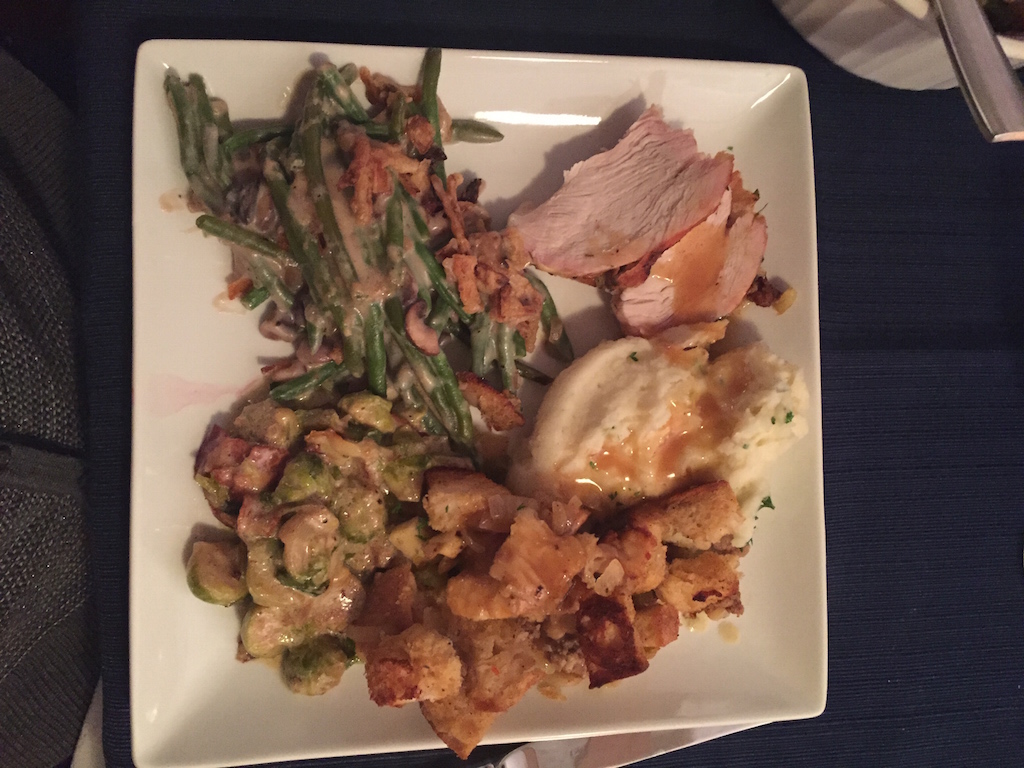
We have been brining the turkey for as long as I’ve been in charge of cooking Thanksgiving dinner but this year we opted to “dry-brine” on the recommendation of Serious Eats (plus, it saves fridge space since we don’t have to submerge the bird). So with some help from my dad (I couldn’t cut the backbone out myself) I spatchcocked the turkey, covered it with the dry brine overnight, and day of covered it with herb butter and roasted it to temperature, it only took 80 minutes for a 12 pound turkey. So dry-brined herb-rubbed spatchcocked roast turkey? Marked down as my new favorite way to go, the skin was super crisp (courtesy of the dry brine with baking powder) and, per usual when cooking poultry to temperature not to time, very moist.
The green bean casserole recipe is a Thanksgiving standard and the only variation I do is to make the mushroom sauce from scratch rather than courtesy of Campbell’s soup. My recipe is based off of Martha Stewart’s green bean casserole but I add a bit of cayenne pepper and go the traditional route of French’s fried onions rather than making my own topping with shallots.
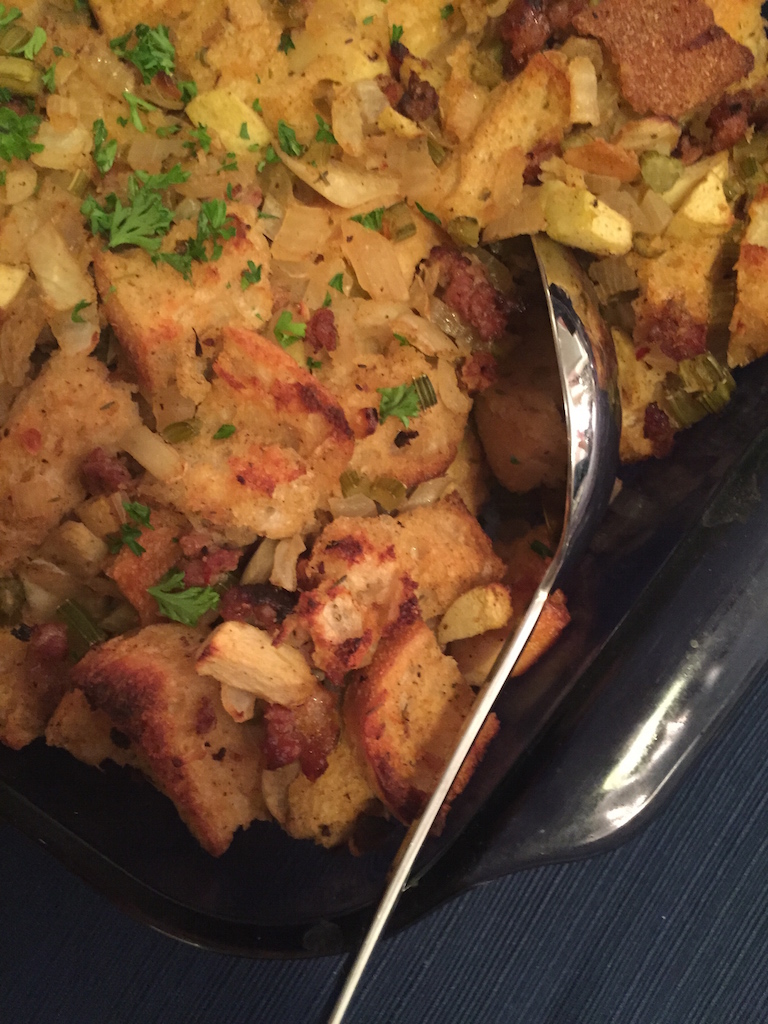
The stuffing is one that I never really use a recipe for but is based off of this sausage and apple stuffing I saw made on “Party Line with the Hearty Boys” on Food Network way back when. I’ve omitted the cranberries since then and use sourdough bread cubes (bread courtesy of Blackbird Bakery in Williamsburg) and this time around we didn’t actually have poultry seasoning so I made our own seasoning blend (sage, thyme, rosemary, black pepper), and I think it actually tasted better that way.
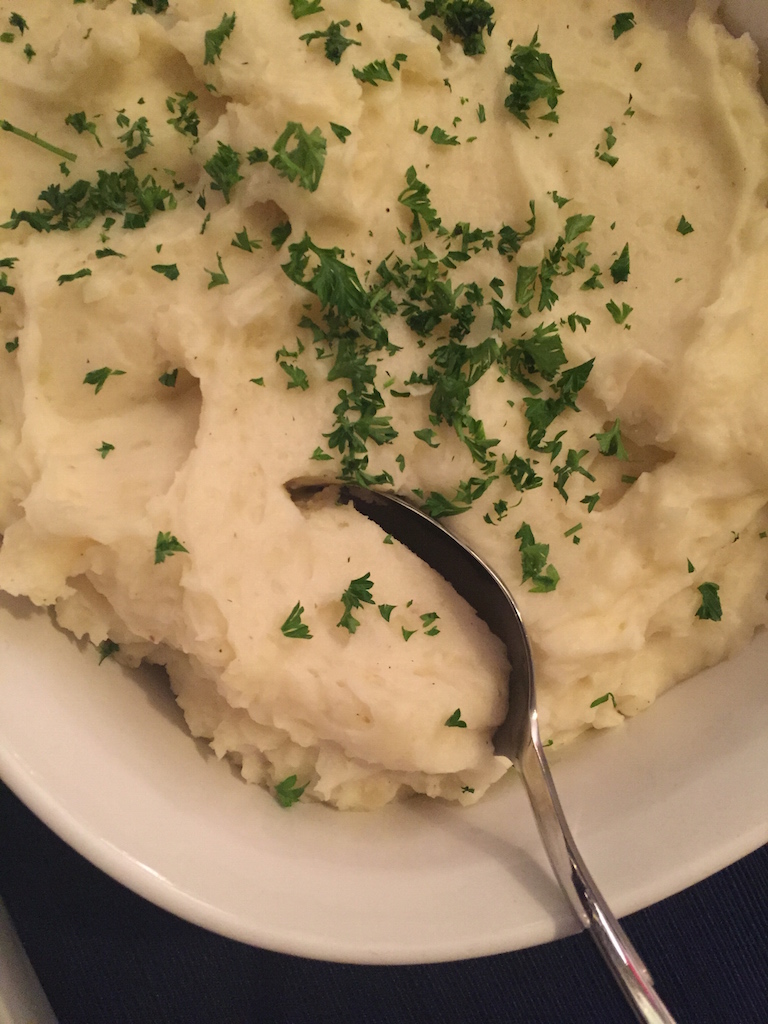
Mashed potatoes, pretty standard with lots of butter (is there any other way?)
The new dish this year was one that Jeremy came across on Serious Eats. Typically we’ve had brussel sprouts with bacon but this year, we went all out and tried this Creamy, Cheesy Brussel Sprout Gratin. Wow was it rich and decadent, a totally different dish than usual with the brussel sprouts, but very tasty.
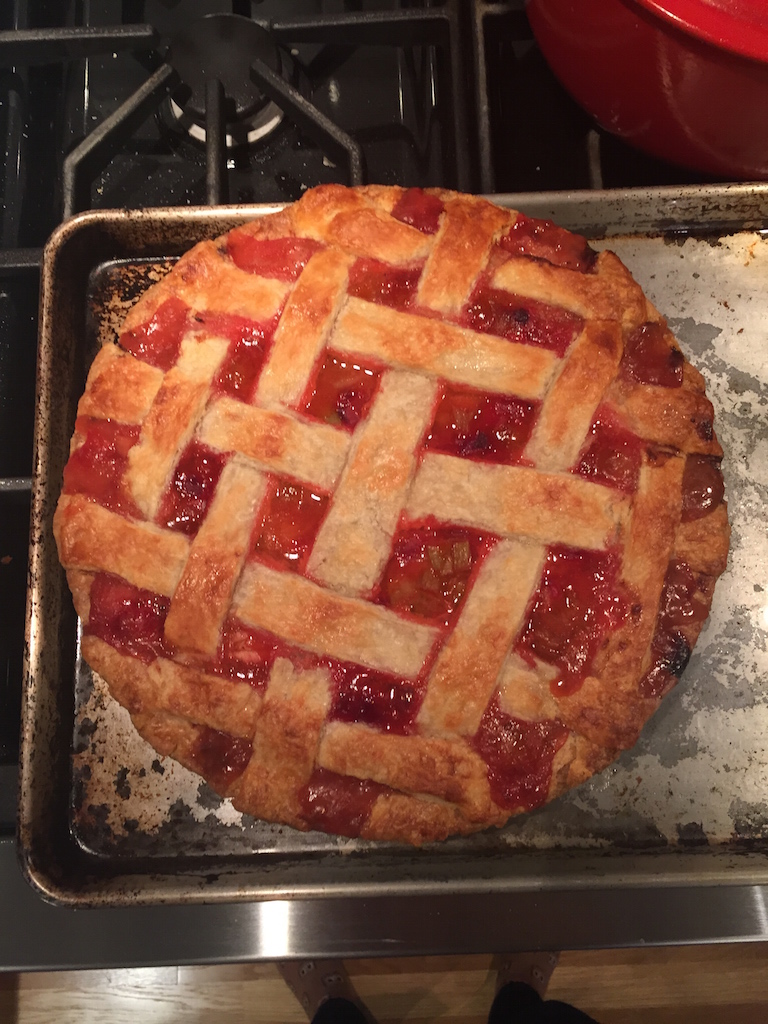
We made two pies this year, strawberry rhubarb and pumpkin, and made the crust according to Michael Ruhlman’s ratio (3 parts flour : 2 parts fat : 1 part liquid). Jeremy had had success before with this crust recipe using all butter so that’s the way I went and it turned out very well. It was a bit crazy seeing all the butter bubbling away in the oven through the clear glass pie plate but the crust was pretty tender and very flaky with lots of crisp on the edges. Next time I may introduce a little bit of lard/shortening to get a little more tender crumb but overall the crust, and the pies, were delicious.
For the past few months Jeremy and I have gotten together with three other couples to have “wine dinners.” Each couple brings a course (appetizer, first course, main course or dessert) and a bottle (or two, or three) of a wine they think pairs well with their dish. So far we have had three dinners with Italian, Spanish, and most recently “comfort food” themes. Jeremy and I were in charge of dessert this go-round and figured, what is a more classic comfort food dessert than apple pie? I began venturing into from-scratch pie making this holiday season, starting with an apple pie for Thanksgiving and followed by a strawberry-rhubarb pie for Christmas Day dinner, so this was my third pie-making attempt, second apple.
Photo by Jeremy Beker (I was mixing pie crust at this point)
Jeremy and I both looked around online and through our library of cookbooks in search of the “best” apple pie recipe. In the end the Allrecipes.com iPad app provided the winning base recipe, Apple Pie by Grandma Ople. The recipe has over 4,400 reviews and had a five out of five star rating, so I figured with that kind of crowd-sourced recommendation, it was probably a good place to start. We knew we wanted to use spices in the pie filling (the original recipe does not call for spices oddly enough) so that was the first “tweak.” We had some real cinnamon that we brought back from the Caribbean two years ago so that was the star spice in our blend, along with nutmeg and allspice. If you have never had “real” cinnamon, you are in for a treat. Most “cinnamon” you buy in the grocery store is actually from the cassia plant, and has a much sharper and spicier flavor whereas cinnamon is a much warmer, rounder and richer flavor. (To learn more about cinnamon and cassia, and to buy either one, Spice House is a great resource.)
Our second tweak stemmed from the step in Grandma Ople’s recipe that called for creating a syrup out of water, butter and sugar to use to pour over the apples once you had mounded them into the pie. From our earlier recipe readings, and using a bit of science from Alton Brown’s Super Apple Pie recipe, I decided to first put 2/3 of the sugar in with the apples and let them drain over a bowl for about an hour and a half, then used that juice in place of the water for the syrup, reducing it down to really intensify the apple flavor. This way there is not as much liquid in the pie to make the crust soggy and you capture and concentrate the apple flavor. We also opted to pour the syrup in with the sliced apples and mix it together rather than just pouring it over the apples once they were in the pie pan.
Apples expertly mounded by Jeremy (who also took the photo)
The third tweak was to use a trio of apples rather than just one variety. Jeremy found an article on Serious Eats testing the best apples for apple pie so using their recommendations for the two best “pie apples” (selected for their flavor) Braeburn and Golden Delicious, along with the “traditional” Granny Smith (for structure and acidity) we had our star ingredients selected.
I had very good luck with the pie crust I made for my Christmas strawberry-rhubarb pie so I reused that recipe, the combination of butter and shortening is the key, you get the flavor and flakiness from the butter plus a tender crust from the shortening.
Three-apple pie with warm spices and a flaky sugary crust.
Author: Tiffany Broadbent
Recipe type: Dessert
Serves: 10
Ingredients
2 Braeburn apples, peeled, cored and sliced into ¼" slices
2 Golden Delicious apples, peeled, cored and sliced into ¼" slices
3 Granny Smith apples, peeled, cored and sliced into ¼" slices
½ cup unsalted butter
3 tablespoons all-purpose flour
½ cup white sugar
½ cup packed brown sugar
1 tablespoon cinnamon (fresh ground if possible)
1 teaspoon allspice (fresh ground if possible)
1 teaspoon nutmeg (fresh ground if possible)
Instructions
Preheat oven to 350 degrees F and place your oven rack in its lowest position.
Combine the brown and white sugar, reserving ⅓ cup.
Mix the sugars in with the apples, place in a colander over a large bowl to collect juices, let sit for at least 1 hour.
Make the pie crust and refrigerate for 1 hour.
Once apples and pie crust are ready, melt the butter in a saucepan. Stir in flour to form a paste. Add apple juices and remaining sugar mixture and bring to a boil. Reduce temperature and let simmer for a few minutes and then remove from heat.
Roll out your bottom and top pie crusts.
Place the bottom crust in your pan and brush with egg-whites.
Add the spices into the melted sugar mixture and mix in with the apples.
Layer the apples in the pie pan so there is little space between the slices, continue with as many apple slices as you can fit, mounding in the center.
Cover with top crust, seal edges, cut slits to vent, brush with egg-whites and dust with sugar.
Bake 15 minutes in the preheated oven on the lowest rack of the oven.
Move pie up to the middle rack of the oven and continue cooking until the apples are softened, approximately 45 minutes.
Notes
Feel free to tweak the spices to your taste.
By keeping the apple layers as compact as possible you can prevent the apples from "sinking" as much when they cook leaving you with a half empty pie shell.
The egg wash on the bottom crust will help keep the crust from getting soggy. The egg wash on the top crust helps with browning and acts as an adhesive for the sugar.
To keep the crust from overcooking, make a "collar" to go around the pie out of tin foil.
Starting at the lowest rack of the oven helps with cooking the bottom crust and making sure it doesn't get too soggy.
Wine Pairing Recommendations: We had this with the Wagner 2008 Riesling ice wine but muscat, riesling, sauternes or late harvest wines would also work nicely (according to What to Drink with What You Eat).
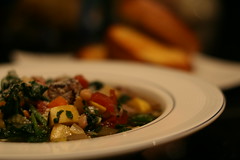
So dinner is done and I have to say, it was quite tasty. I followed my plan mentioned in the prior post and chopped and sauteed the zucchini and squash in the same pan I browned and cooked the sausage in and I think that really added a lot of flavor to the dish. Served it with some (store bought) garlic bread and it made a very nice, filling, and moderately healthy meal. And I have enough leftovers for about 4 more meals even after sending 2 servings home with Jeremy.
I also ended up making the vegetable stock today as well as my started-off-as-minestrone-ended-up-more-a-vegetable soup. I didn’t have enough onion based on various stock recipes I’d found so I walked over to Trader Joe’s for a small bag of onions and quartered 3 of those, together with the half onion I had left over from the soup as the start of the stock.
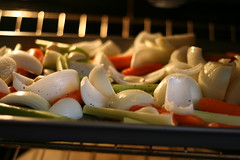
Veggies Before
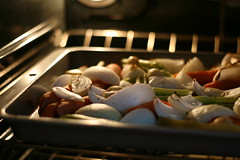
Veggies After
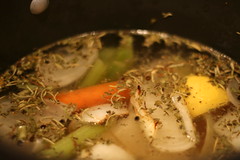
I then third-ed all of the remaining celery and carrots on the bias (to get more surface area exposed) and peeled and separated a half head of garlic and tossed it all together with a bit of olive oil, salt and pepper and stuck it in a 425 degree oven for about half an hour to get all kinds of good roasted flavors out of the veggies first. Once they were ready I added just enough water to cover all of the vegetables to my big stock pot, added just about every dried herb I had in my pantry (rosemary, thyme, herbs de provance, bay leaves, random herb packet from Fresh Market, whole peppercorns and kosher salt) and got everything up to a simmer and let it go for an hour (more than that and, according to the internet, the vegetables get mushy and become bitter).
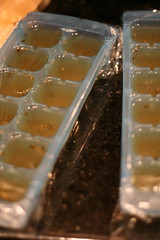
After the hour was up I made a quick ice bath in my kitchen sink (much to the chagrin of the cats, pouring ice into a stainless steel sink is very loud), strained the stock into a metal bowl and cooled things off as quickly as possible then divided the stock up into ice cube trays and a quart plastic container for later use (very tasty as base for rice or risotto), also added a bit of it to the minestrone as it was a bit low on broth after adding all of the vegetables and sausage. Overall, the cooking day was a success I think and all of the photos are posted on my Flickr page.
So I just came upon this New York Times article on the best (ie. most nutritional) ways to cook vegetables. It says
The amount and type of nutrients that eventually end up in the vegetables are affected by a number of factors before they reach the plate, including where and how they were grown, processed and stored before being bought. Then, it’s up to you. No single cooking or preparation method is best.
So first, that’s real helpful right? an article that is titled “Finding the Best Way to Cook All Those Vegetables” that then concludes there’s no “best” way. But in a way that’s good, it avoids supporting the “everything must be steamed” craze we had a few years ago (not that I’m anti-steaming, just please put a little salt, pepper, herbs, butter…something on them when they’re done, otherwise bo-ring). One of the things I found most interesting in this article was that eating raw vegetables is not always the best way to get the vitamins and nutrients and phytochemicals (yes, scientific word, Alton Brown would be proud) out of the food, which is great, since I’m not particularly a fan of raw vegetables (except carrots, celery and cucumber I’ll take those with ranch dip or hummus anytime). The article concludes that any way we can get people to eat veggies is good, and having a little fat with the vegetable, butter with the broccoli, or mozzarella with your tomatoes, can actually help you absorb more nutrients. As long as people think something tastes good, they’ll eat it, even when it’s actually good for them. The study only looked at boiling, steaming, microwaving and pressure cooking…wonder how grilling affects the nutritional value (aside for the token bit of added carbon from the lovely grill marks) or sauteeing (in a wok perhaps ;)).


 This recipe for
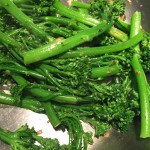


 But in a way that’s good, it avoids supporting the “everything must be steamed” craze we had a few years ago (not that I’m anti-steaming, just please put a little salt, pepper, herbs, butter…something on them when they’re done, otherwise bo-ring). One of the things I found most interesting in this article was that eating raw vegetables is not always the best way to get the vitamins and nutrients and phytochemicals (yes, scientific word,